Painting Hardie Siding A Comprehensive Guide
Painting Hardie siding is a significant home improvement project, and understanding the process is key to a successful outcome. This guide covers everything from choosing the right paint to preparing the surface and applying it effectively. From initial preparation to final touches, this comprehensive approach ensures a professional and lasting finish.
Hardie siding, a popular choice for its durability and aesthetic appeal, requires careful consideration when painting. This guide will walk you through the various aspects, including different siding types, paint options, and essential preparation steps. You’ll discover how to select the best paint for your needs, prepare the surface for optimal adhesion, and execute the painting process for a flawless result.
Introduction to Painting Hardie Siding
Hardie siding, manufactured by James Hardie, is a popular choice for exterior home applications. Its fiber cement composition provides durability and resistance to weather elements, but proper preparation and painting are essential for long-lasting results. This section details the specifics of Hardie siding, emphasizing the critical steps in its painting process.
Hardie siding’s key characteristic, its fiber cement construction, offers exceptional durability and weather resistance. This composition, a blend of cement, cellulose fibers, and other additives, makes it highly resistant to rot, insects, and fire. However, this material’s unique properties also necessitate specific painting procedures to achieve optimal results. Different Hardie siding types exist, each with subtle variations that can affect painting techniques.
Hardie Siding Types and Their Impact on Painting
Hardie siding comes in various forms, each impacting the preparation and painting process. Understanding these differences is crucial for a successful project. The most common types include HardiePlank, HardiePanel, and HardieTrim. Each has unique surface textures and profiles that require tailored preparation. Variations in these profiles necessitate careful attention to detail during the application process.
Importance of Surface Preparation
Proper surface preparation is paramount to achieving a long-lasting and aesthetically pleasing paint finish on Hardie siding. This process involves cleaning, repairing, and priming the surface to ensure optimal adhesion and prevent premature paint failure. Thorough cleaning is essential to remove any loose debris, dirt, or mildew that could impede the paint’s bonding. Damaged or deteriorated sections require patching and repair to maintain the structural integrity and paint adherence. Priming the surface, using a suitable primer, ensures a consistent base for the topcoat, promoting uniform coverage and longevity.
Benefits of Painting Hardie Siding
Painting Hardie siding offers numerous benefits, enhancing both its appearance and longevity. A fresh coat of paint can significantly improve the curb appeal of a home, adding value and enhancing its aesthetic appeal. Painting also protects the siding from the elements, extending its lifespan by preventing degradation caused by UV rays, moisture, and other environmental factors. Properly maintained Hardie siding, with a well-applied paint job, can endure decades of exposure to harsh weather conditions. Furthermore, it provides a protective barrier against water absorption, reducing the risk of water damage and associated issues like mold or mildew growth.
Choosing the Right Paint
Selecting the appropriate paint for your Hardie siding is crucial for achieving a long-lasting, aesthetically pleasing finish. Proper paint selection considers factors like the paint type, exterior qualities, and sheen level. This section details the key considerations for choosing the right paint for your Hardie siding project.
Exterior paints are formulated to withstand the elements, ensuring your siding remains protected and attractive for years to come. Choosing the correct type of paint, along with its specific attributes, is essential for optimal results. Understanding the characteristics of various paint types and their suitability for Hardie siding will guide your decision-making process.
Paint Types for Hardie Siding
Choosing the right paint type for Hardie siding is critical for longevity and aesthetic appeal. Different paint types offer varying levels of protection and performance.
- Acrylic paints are a popular choice for Hardie siding due to their durability and resistance to weathering. They provide excellent adhesion and a smooth finish. They are formulated with a water-based acrylic polymer, making them relatively easy to apply and clean up. Their water-based nature also contributes to reduced odor and faster drying times.
- Latex paints, another water-based option, are widely used for exterior applications. They offer good coverage, a relatively smooth finish, and are easy to apply. Latex paints are generally affordable and readily available. The water-based nature of latex paints contributes to a low-VOC environment, which is increasingly important for environmentally conscious homeowners.
- Alkyd paints, while less common for Hardie siding now, offer excellent durability and protection against the elements. However, alkyd paints are solvent-based, which means they have a stronger odor and require more cautious handling during application. They can also take longer to dry compared to water-based options. For some homeowners, the environmental impact and potential health concerns associated with solvent-based paints are a deterrent.
Exterior Paint Qualities
Exterior paints are specifically designed to withstand the harsh conditions of outdoor environments. These paints possess unique qualities that make them suitable for prolonged exposure to sun, rain, and temperature fluctuations.
- UV resistance is paramount. Exterior paints are formulated with pigments and resins that resist fading and degradation caused by ultraviolet (UV) rays from the sun. This helps maintain the color and integrity of the paint finish over time. For example, a paint with a high UV resistance rating might be preferred for areas experiencing significant sunlight exposure.
- Water resistance and mildew resistance are critical for preventing damage to the siding. Exterior paints often incorporate specific ingredients to repel water and inhibit the growth of mildew and mold. This protection is vital to maintain the appearance and structural integrity of the siding, especially in humid or wet climates.
- Adhesion to Hardie siding is crucial for a lasting paint job. Exterior paints are formulated with advanced bonding agents that create strong adhesion to the siding material. This ensures the paint adheres firmly to the surface, resisting peeling or cracking over time.
Paint Sheen Levels
Paint sheen levels affect the appearance and durability of Hardie siding. Choosing the appropriate sheen is essential for both aesthetic appeal and practical protection.
- Flat paints provide a matte finish, which can hide imperfections on the siding surface. However, flat paints may require more frequent repainting due to their tendency to show dirt and marks more readily.
- Semi-gloss paints offer a balance between appearance and protection. They have a subtle sheen that reflects light, enhancing the appearance of the siding. Semi-gloss paints also provide good protection against dirt and water.
- High-gloss paints offer a highly reflective surface, providing a vibrant, glossy finish. High-gloss paints are susceptible to showing imperfections and dirt more readily than other sheen levels.
Preparing the Surface for Painting
Proper surface preparation is critical for a long-lasting and aesthetically pleasing paint job on Hardie siding. Ignoring this step can lead to uneven application, poor adhesion, and premature paint failure. A clean, properly repaired, and primed surface ensures the paint adheres well, maximizing its longevity and protecting the siding from the elements.
Thorough preparation involves several crucial steps, from meticulous cleaning to meticulous priming. Understanding and correctly executing these steps is essential to achieving a high-quality finish.
Cleaning Hardie Siding
Effective cleaning is the first step in preparing Hardie siding for painting. This involves removing dirt, grime, mildew, and loose debris. Using a pressure washer is often an efficient method, but extreme pressure can damage the siding. A gentle pressure setting is recommended. For stubborn stains or mildew, a solution of mild detergent and water can be used. Ensure thorough rinsing to remove all cleaning solution residues.
Repairing Damage
Inspect the Hardie siding for any damage, such as cracks, dents, or holes. Minor imperfections can be filled with a suitable patching compound, following the manufacturer’s instructions. Larger damage may require more extensive repairs. Use a patching compound designed for exterior use and ensure proper drying time before painting. If the damage is significant, consult a professional for repair advice.
Caulking and Sealing
Caulking and sealing around windows and trim are essential for preventing moisture penetration and maintaining the integrity of the siding. Improper sealing can lead to water damage, mold growth, and premature paint deterioration. Use a high-quality exterior caulk designed for the application, paying particular attention to gaps and crevices. Apply a bead of caulk, smoothing it out with a caulk tool, ensuring a clean and consistent finish. This step is vital for long-term protection.
Priming Hardie Siding
Priming Hardie siding is crucial for improving paint adhesion and achieving a uniform finish. A quality primer will create a smooth surface for the paint to adhere to. Choose a primer specifically formulated for exterior use and Hardie siding. Follow the manufacturer’s instructions carefully, ensuring adequate drying time before applying the top coat. Proper priming will increase the longevity of the paint job.
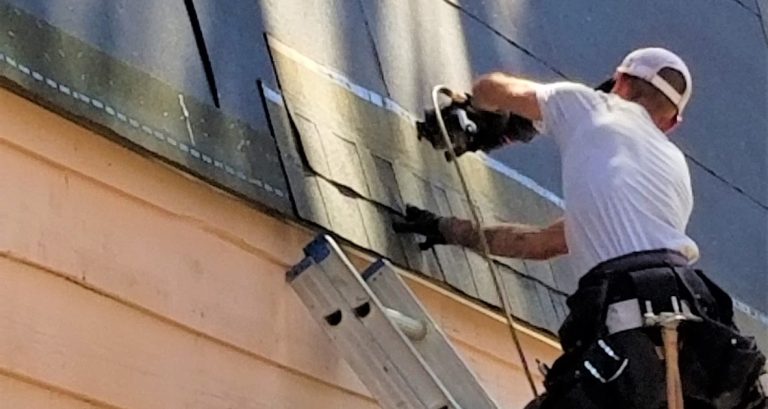
Painting Techniques and Tools
Source: pinimg.com
Painting Hardie siding effectively hinges on the right techniques and tools. Proper application ensures a smooth, even finish that protects the siding and enhances its aesthetic appeal. Careful consideration of these aspects guarantees a professional-looking result, minimizing the need for touch-ups or repainting shortly.
Roller Techniques for Hardie Siding
Roller application is a common and efficient method for painting Hardie siding. The selection of the appropriate roller type is crucial for optimal results. A high-quality nap roller, typically ranging from 3/8 inch to 1 inch, is ideal for Hardie siding. Using a longer nap roller, say 1.5 inches or more, can cause the paint to pool, resulting in an uneven finish.
- Proper Roller Application: For a smooth, consistent finish, apply the paint in overlapping, smooth strokes, ensuring complete coverage of the surface. Avoid excessive pressure, which can cause paint to splatter or streak.
- Multiple Passes: Applying the paint in multiple thin coats, rather than one thick coat, is essential for a more even and long-lasting finish. This prevents runs and allows for adequate drying time between coats.
- Avoiding Runs: When applying paint, ensure a smooth and consistent flow. If runs appear, use a clean, damp rag to gently remove the excess paint while it is still wet. Avoid applying too much paint in one spot.
Brush Techniques for Hardie Siding
Using a brush, particularly in corners and tight spaces, is often more precise than using a roller. A quality angled brush is best suited for this application.
- Brush Application: When painting with a brush, apply the paint in smooth, even strokes, avoiding excessive pressure. For Hardie siding, use a small brush to detail around windows, doors, and other trim.
- Avoiding Brush Marks: Work in small, overlapping sections to minimize the appearance of brush strokes. Using a clean brush with a clean stroke is essential for preventing brush marks.
- Proper Brush Angle: A consistent angle is important when using a brush. A slight angle will prevent paint from pooling in one area and will help with a smooth application. This ensures the paint is applied evenly.
Maintaining Tools
Proper maintenance of painting tools is vital for ensuring their longevity and effectiveness. This includes thoroughly cleaning the tools after each use to prevent paint from drying and hardening.
- Cleaning Rollers: Immediately after use, clean rollers with a suitable paint thinner or cleaner. This prevents paint from drying and hardening, making cleaning more efficient. Always follow the manufacturer’s instructions for cleaning.
- Cleaning Brushes: Clean brushes immediately after use with a suitable paint thinner or cleaner. This prevents the paint from drying and hardening. Avoid using harsh detergents or abrasive cleaners that could damage the brush bristles.
- Storing Tools: Store tools in a clean, dry area to prevent the growth of mold or mildew. Protect the tools from dust or dirt to ensure that they remain clean and effective.
Step-by-Step Painting Guide for Hardie Siding
Applying paint to Hardie siding involves several key steps. This structured approach ensures a quality finish and prevents common issues.
- Surface Preparation: Thoroughly clean the siding, removing any loose debris, dirt, or old paint. Ensure the surface is completely dry before starting the painting process.
- Primer Application: Applying a primer is crucial for optimal adhesion and paint longevity. A quality primer is necessary for achieving a professional finish.
- Thin Coat Application: Apply thin, even coats of paint using a roller or brush. Allow each coat to dry completely before applying the next. This process ensures an even finish, preventing problems with paint running or clumping.
- Inspection and Touch-ups: Inspect the painted siding for any missed areas or imperfections. Re-paint any areas that need touch-ups as needed. This step is critical for achieving a flawless finish.
Painting Schedule and Considerations
Planning a Hardie siding painting project requires careful consideration of various factors to ensure a successful and efficient outcome. A well-defined timeline, along with awareness of influencing factors and safety protocols, minimizes disruptions and maximizes the quality of the final result. This section details crucial aspects of scheduling and preparation.
Timeline for Hardie Siding Projects
A realistic timeline for painting a Hardie siding project depends heavily on the size of the area and the complexity of the job. A detailed schedule should account for preparation, painting, and drying times. For example, a small, single-story house might take a weekend, while a large, multi-story home might require multiple weekends or even a few weeks, contingent on the project’s specifics. The timeline must be flexible to accommodate unforeseen circumstances, like bad weather or unexpected issues.
Factors Influencing Painting Schedules
Several elements significantly affect the painting schedule. Weather conditions play a pivotal role. Rain, extreme temperatures (both high and low), and humidity can delay the project considerably. Siding size is another crucial factor. Larger areas require more paint, more time for application, and potentially more coats. Additionally, the condition of the existing siding, such as the presence of loose or damaged sections, needs to be assessed and addressed, as this can affect the timeline. For instance, a house with significant pre-existing damage or a large area might extend the painting timeline. Careful planning for these factors is essential.
Checklist for Painting Materials and Supplies
A comprehensive checklist of materials and supplies ensures that everything needed is readily available, preventing delays and unexpected expenses during the project. This includes the type of paint chosen (based on the previous section), primer, brushes, rollers, drop cloths, safety glasses, and respirators. Other essential items may include ladders, scaffolding, or other equipment, depending on the height of the project.
| Item | Quantity | Notes |
|---|---|---|
| Paint | Based on coverage | Consider extra for touch-ups. |
| Primer | Based on coverage | Matching the paint type is crucial. |
| Brushes/Rollers | Appropriate size | Ensure good quality for optimal results. |
| Drop Cloths | Sufficient size | Protect the surrounding area. |
| Safety Glasses | One per person | Essential for eye protection. |
| Respirator | One per person | Protect from paint fumes. |
| Ladders/Scaffolding | As needed | Ensure stability and safety. |
Safety Precautions for Painting Hardie Siding
Safety should be paramount during any painting project. Proper protective gear is essential for minimizing the risk of accidents. Safety glasses, respirators, and work gloves are crucial for protecting the eyes, lungs, and hands from paint fumes, splatters, and potential falls.
“Always follow the manufacturer’s instructions for the specific paint and protective equipment.”
Consider working in well-ventilated areas and taking breaks when needed. If the project involves heights, appropriate safety equipment, such as harnesses and scaffolding, is crucial. Proper preparation, such as securing the work area and using the correct equipment, significantly reduces the likelihood of accidents.
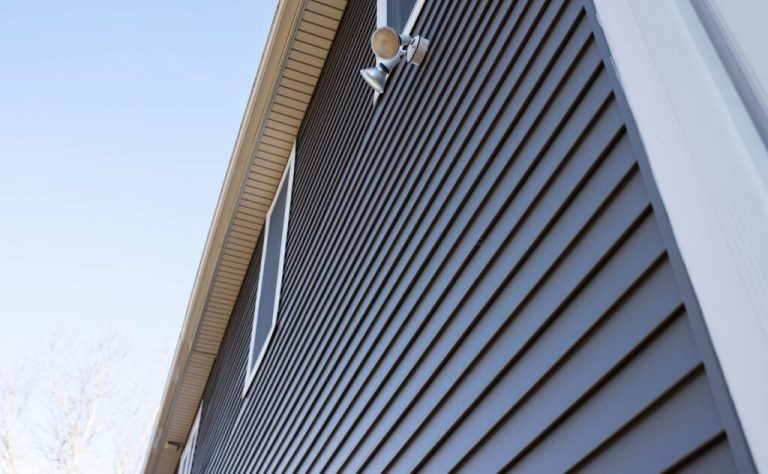
Painting, Troubleshooting, and Maintenance
Source: dependablepaint.net
Addressing potential issues and maintaining your Hardie siding paint job is crucial for longevity and aesthetic appeal. Proper troubleshooting and preventative maintenance will minimize costly repairs and ensure your siding retains its beauty for years to come. This section will Artikel common problems, solutions, and the necessary maintenance steps.
Common Painting Problems and Solutions
Identifying and addressing painting problems promptly can prevent more extensive damage. Understanding the causes and solutions for these issues will save time and money.
- Peeling Paint: Peeling paint often indicates improper surface preparation, inadequate primer application, or the use of incompatible paints. Solutions include removing the loose paint, repairing any damaged areas, and ensuring proper surface preparation before repainting with a suitable primer and paint.
- Discoloration: Discoloration can result from environmental factors, such as UV exposure or poor paint quality. Addressing discoloration may involve repainting the affected areas with a paint formulated to resist UV degradation or, in severe cases, a complete repaint of the siding.
- Chalking: Chalking, a powdery residue on the paint surface, is a sign of paint degradation due to UV exposure and environmental factors. A complete repaint with a high-quality, UV-resistant paint is usually necessary.
- Bubbling: Bubbling paint can stem from moisture issues, temperature fluctuations, or inadequate surface preparation. Addressing moisture problems is crucial. Removing the blistered paint, addressing the underlying moisture issues, and repainting the affected area with the correct paint is usually the solution.
- Streaking or Uneven Application: This often arises from inadequate stirring of the paint, improper brush technique, or inconsistent application. Ensuring the paint is properly mixed, using the right tools and technique, and maintaining consistent application can mitigate this problem.
Dealing with Peeling Paint or Discoloration, Painting Hardie Siding
A systematic approach to peeling or discolored areas is essential.
- Assess the Extent of Damage: Carefully examine the affected area to determine the scope of the problem. If only a small portion is affected, you might only need to repaint that area. However, if a significant portion of the siding is damaged, a complete repaint might be more efficient.
- Prepare the Surface: Remove all loose or flaking paint using a scraper or wire brush. Thoroughly clean the area to eliminate dust, debris, and any residual old paint. Repair any damaged wood or siding. Apply a suitable primer to create a smooth and even surface.
- Apply the Paint: Use a high-quality paint designed for Hardie siding. Apply multiple thin coats, allowing each coat to dry completely before applying the next. This method ensures better adhesion and prevents paint problems.
Regular Maintenance for Painted Hardie Siding
Routine maintenance is crucial for maintaining the longevity of your Hardie siding.
- Regular Inspections: Periodically inspect the siding for any signs of damage, such as peeling paint, discoloration, or loose debris. This proactive approach can help prevent minor issues from escalating into major problems.
- Cleaning: Regular cleaning helps prevent dirt and debris buildup, which can contribute to discoloration and other issues. Use a mild detergent and a soft-bristled brush or a power washer to clean the siding. Avoid using harsh chemicals or abrasive materials.
- Addressing Moisture Issues: Promptly address any water damage or moisture issues to prevent the growth of mold or mildew and maintain the integrity of the siding. Proper drainage around the home is important.
Frequency of Repainting Hardie Siding
The frequency of repainting Hardie siding depends on various factors, including the quality of the paint, environmental conditions, and the maintenance performed. Generally, repainting every 5-7 years is a good guideline. However, if the siding is exposed to harsh weather conditions or if you notice signs of damage, repainting sooner may be necessary. Factors like intense sunlight, heavy rainfall, and high humidity may necessitate more frequent repainting.
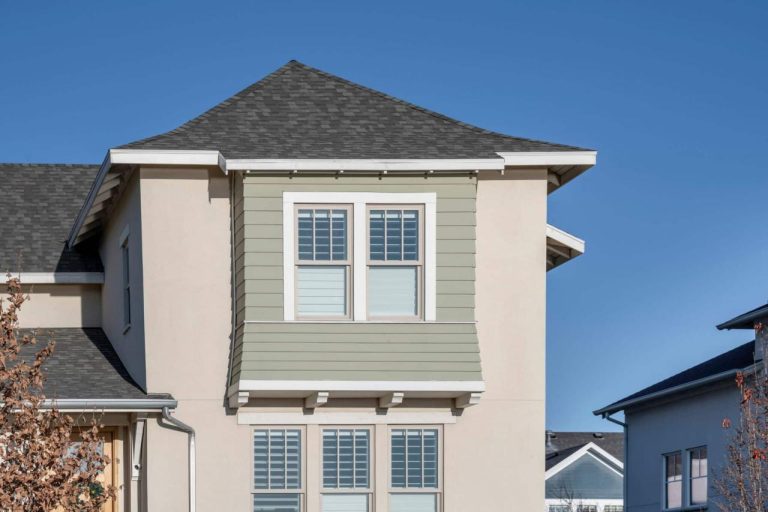
Visual Examples and Case Studies: Painting Hardie Siding
Transforming your home’s exterior with Hardie siding often involves careful consideration of paint choices. This section explores diverse painting styles and color palettes, demonstrating how paint selection can significantly impact the aesthetic appeal of your home. Understanding these examples will empower you to make informed decisions for your project.
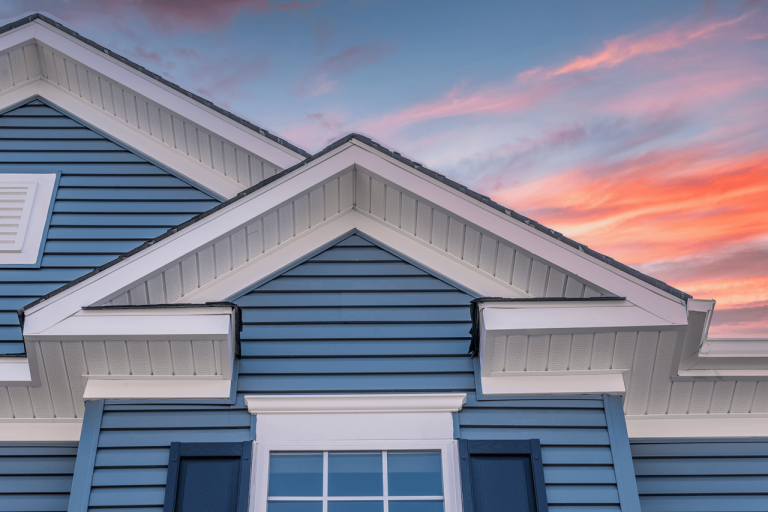
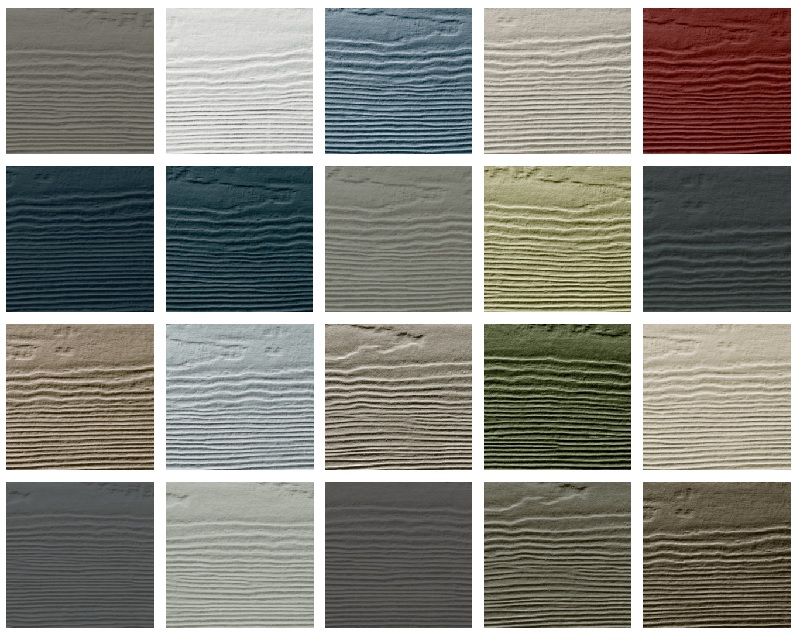
Different Painting Styles and Color Schemes
Various painting styles and color schemes can be applied to Hardie siding, each offering a unique visual impact. A classic approach might involve a neutral color palette, enhancing the timeless appeal of the home. Modern styles often embrace bolder colors and contrasting accents, adding a touch of contemporary flair. Accentuating architectural details with contrasting colors can further elevate the visual appeal. Consider the existing architectural features and desired aesthetic when selecting a paint style.
Impact of Paint Colors on Home Aesthetics
The choice of paint color profoundly affects the perceived aesthetics of a home. Light colors, such as whites and pastels, can create an airy and spacious feel, particularly beneficial for smaller homes. Deeper, richer colors can add warmth and drama to a home, making it stand out in its surroundings. The color of the surrounding landscape, such as the roof and landscaping, should also be considered when selecting a paint color.
Successful Painting Project Examples
The following table showcases successful Hardie siding painting projects, demonstrating the transformative power of paint. These examples highlight the variety of aesthetics possible, from classic to modern. Note that these are illustrative examples, and actual results may vary based on individual conditions.
| Before | After | Color Scheme | Description |
|---|---|---|---|
| A beige-toned Hardie siding home with a traditional roof. | The same home was painted with a deep teal color. | Teal/Beige Contrast | This example showcases a bold transformation using a contrasting color scheme. The teal paint adds a modern touch, creating a distinct visual identity for the home. |
| A light gray Hardie siding home with a dark brown roof. | The same home was painted with a warm gray color. | Warm Gray | This demonstrates how subtle color changes can enhance the home’s visual appeal. The warm gray tone complements the existing architecture and landscape. |
| A white Hardie siding home with a dark red roof. | The same home was painted with a soft gray-blue color. | Soft Gray-Blue | This shows how a subtle color shift can balance the existing color scheme. The gray-blue tone provides a soothing and inviting feel while maintaining the home’s unique character. |
Comparison of Paint Colors and Their Effect
This table illustrates how different paint colors can affect the visual perception of Hardie siding. The impact of color varies based on the specific shade and undertones of the paint, as well as the surrounding environment.
| Paint Color | Undertones | Visual Effect | Considerations |
|---|---|---|---|
| Benjamin Moore Simply White | Cool, neutral | Clean, crisp, versatile | Excellent choice for creating a bright and airy atmosphere. |
| Sherwin-Williams Agreeable Gray | Warm, neutral | Subtle, sophisticated | Offers a balanced approach, blending seamlessly with various architectural styles. |
| Valspar Iron Ore | Cool, deep | Bold, dramatic | Suitable for homes seeking a modern and striking appearance. |
| Behr Swiss Coffee | Warm, neutral | Inviting, comforting | Creates a cozy and welcoming ambiance, ideal for family homes. |
Materials and Resources
Selecting the right paint, tools, and materials is crucial for a successful Hardie siding painting project. Proper preparation and selection minimize issues and ensure a long-lasting, aesthetically pleasing finish. Careful consideration of each element will contribute to the overall project success.
Choosing the correct materials is critical to achieving a quality finish and longevity. The paint’s formulation, the tools’ effectiveness, and the overall approach to the project will directly impact the outcome. This section details important aspects of these considerations.
Common Paint Brands and Features
Various paint brands offer specialized formulations for Hardie siding. Consider factors like durability, weather resistance, and ease of application when making your selection. Popular brands often provide excellent performance. Some brands are known for their ability to resist fading and chalking, while others are preferred for their ability to provide a smooth, even finish.
Recommended Tools and Equipment
A well-equipped toolkit ensures efficient and effective painting. Essential tools for Hardie siding painting include brushes, rollers, drop cloths, ladders, and a paint sprayer. The appropriate tool selection is important. Specific tools, such as specialized brushes or rollers, can enhance efficiency and quality of the paint application.
- Paintbrushes: Different brush types (e.g., angled, flat) are useful for various tasks, including detailed areas and large surfaces.
- Paint Rollers: Varying roller nap sizes are helpful for different paint types and textures. A good quality roller cover is crucial for even coverage.
- Drop Cloths: Essential for protecting surfaces and preventing paint splatters, crucial for clean-up.
- Ladders: Proper height and stability are necessary for safe and efficient application on higher siding sections.
- Paint Sprayer (Optional): Consider a paint sprayer for large areas, offering faster application and potentially more uniform coverage.
- Paint Stirring Sticks: Essential for ensuring paint consistency before application, especially important with thick paints.
- Paint Tray: A paint tray facilitates the smooth rolling and spreading of the paint onto the surface.
Specifications of Painting Materials
The table below presents specifications of common painting materials used for Hardie siding.
| Material | Brand (Example) | Features | Notes |
|---|---|---|---|
| Paint | Sherwin-Williams, Benjamin Moore | Durable, weather-resistant, suitable for exterior use | Choose a paint specifically formulated for Hardie siding |
| Primer | Zinsser, Kilz | Provides adhesion, seals the surface, and prevents bleeding | A quality primer improves paint adhesion and durability. |
| Caulk | DAP, Loctite | Waterproof, weatherproof, seals gaps | Use appropriate caulk for the specific application |
| Sandpaper | 3M, Norton | Various grits for different surface preparations | Appropriate grit is necessary to achieve a smooth surface. |
Resources for Further Information
Various online resources and professional guides offer further insights into Hardie siding painting. Referencing these resources will help to understand the specific needs and requirements for your project. Reading relevant material before starting the project is highly recommended.
- Paint Manufacturers’ Websites: These provide detailed information about their products, including application instructions and specific recommendations for Hardie siding.
- Home Improvement Magazines and Websites: These often publish articles and tutorials on various painting projects, including Hardie siding.
- Local Home Improvement Stores: Consult with staff for recommendations and product advice.
Ultimate Conclusion

Source: elitepropainting.com
In conclusion, painting Hardie siding is a rewarding project that can significantly enhance your home’s curb appeal. By following this guide, you’ll gain a clear understanding of the necessary steps, from surface preparation to choosing the right paint, to achieving a beautiful and long-lasting finish. Remember to prioritize safety precautions, carefully consider your schedule, and address any potential issues promptly for a successful painting experience. The provided resources and examples offer further guidance for your specific project.