Painting Hardie Plank Siding A Comprehensive Guide
Painting Hardie plank siding is a significant home improvement project, requiring careful planning and execution. This guide provides a comprehensive overview of the process, from initial preparation to final touches, ensuring a professional-looking result. Understanding Hardie plank siding’s unique characteristics and choosing the right paint are crucial steps.
This guide covers everything from selecting the perfect paint to preparing the siding for optimal adhesion. It also details crucial aspects like color selection, project management, safety precautions, and cost considerations. The information presented is designed to equip you with the knowledge and tools necessary to tackle this project successfully.
Introduction to Painting Hardie Plank Siding
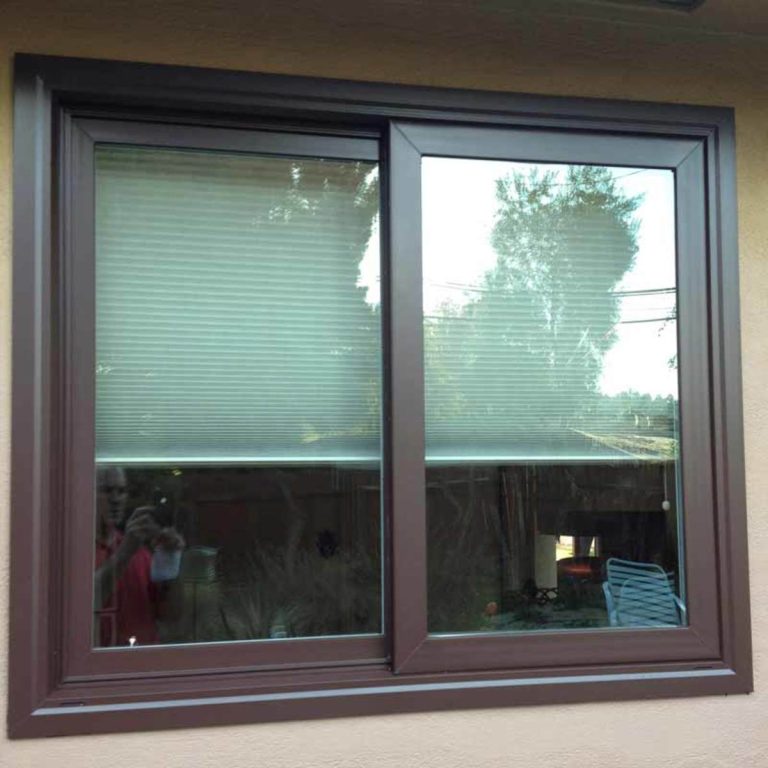
Hardie Plank siding, a popular choice for exterior home construction, is a fiber-cement siding manufactured by James Hardie. It’s known for its durability, resistance to rot, insects, and fire, and its aesthetic appeal. This material is an excellent long-term investment for homeowners seeking a low-maintenance exterior.
Proper preparation is paramount for achieving a long-lasting and aesthetically pleasing paint job on Hardie Plank siding. This involves meticulous cleaning, addressing any damage, and ensuring the surface is primed correctly. Skipping these steps can lead to paint failure and a compromised finish. Understanding common mistakes and adhering to best practices will significantly increase the success of your painting project.
Hardie Plank Siding Characteristics
Hardie Plank siding, a popular choice for exterior home construction, offers several key advantages. Its durability, resistance to rot, insects, and fire, and its aesthetic appeal make it a long-term investment for homeowners. It’s crucial to understand the material’s inherent properties before embarking on a painting project. This understanding allows for better planning and execution of the painting process.
Importance of Proper Preparation
Thorough preparation is essential for a successful painting project on Hardie Plank siding. A clean, properly prepared surface ensures the paint adheres effectively and lasts longer. Addressing imperfections and damage before painting prevents future issues and enhances the aesthetic appeal.
Common Painting Mistakes to Avoid
Several common mistakes can compromise the longevity and appearance of a Hardie Plank siding paint job. Improper surface preparation, inadequate primer use, and selecting the wrong paint type can all contribute to premature paint failure.
- Applying paint in unsuitable weather conditions (rain, high humidity) can affect paint adhesion and result in uneven coverage.
- Failing to properly clean the surface can lead to poor paint adhesion and uneven coverage, causing the paint to peel or chip prematurely.
- Using the wrong type of paint for Hardie Plank siding can lead to issues with adhesion and durability. Specifically, using paints not formulated for fiber cement siding can result in poor performance.
- Skipping the priming step, a critical step in ensuring proper adhesion and minimizing future issues.
Benefits of Painting Hardie Plank Siding
Painting Hardie Plank siding offers several significant benefits. It enhances the curb appeal of a home, protects the siding from the elements, and can significantly increase the property value. Properly applied paint provides a protective barrier against weather damage and can extend the lifespan of the siding.
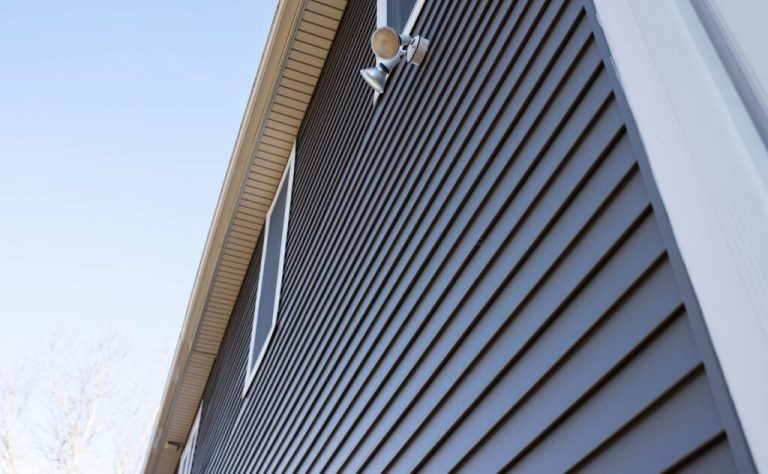
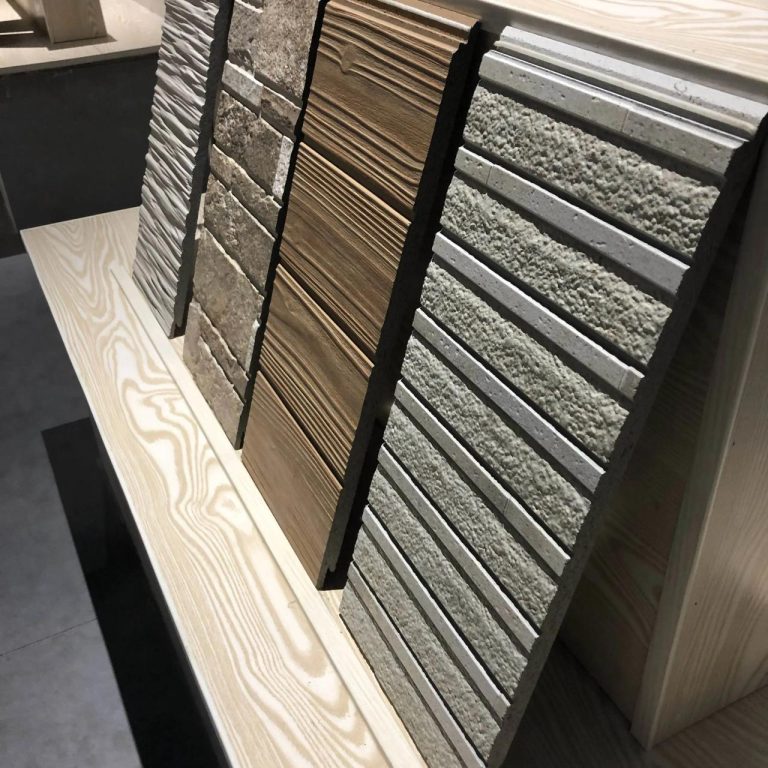
Types of Hardie Plank Siding
Different types of Hardie Plank siding exist, each with varying characteristics. Understanding these variations helps in making informed decisions regarding the most suitable type for a specific project.
| Type | Description | Typical Applications |
|---|---|---|
| HardiePlank Lap Siding | Features a slightly overlapping design. | Ideal for homes with a traditional look. |
| HardiePlank Smooth Siding | Offers a flat, smooth surface. | Suitable for modern or contemporary architectural styles. |
| HardiePlank Siding with varied profiles | Different plank profiles, such as various thicknesses and lengths. | Wide range of architectural styles, providing options for diverse design preferences. |
Choosing the Right Paint
Selecting the appropriate exterior paint is crucial for the longevity and aesthetic appeal of your Hardie Plank siding. The right paint will not only enhance the visual appeal but also protect the siding from the elements, extending its lifespan significantly. Factors such as climate, paint type, and finish all play a role in making the right choice.
Choosing the correct paint involves careful consideration of various factors. These factors, when evaluated thoroughly, can lead to a paint selection that not only enhances the visual appearance of the Hardie Plank but also ensures its durability and resilience against environmental stressors.
Factors to Consider When Choosing Exterior Paint
Proper paint selection for Hardie Plank siding necessitates considering several key elements. The paint’s ability to withstand the specific weather conditions in your region is paramount. Exposure to intense sunlight, heavy rainfall, and temperature fluctuations all influence the paint’s performance. Additionally, the siding’s existing condition, any previous paint jobs, and the desired aesthetic all contribute to the selection process.
Paint Types Suitable for Hardie Plank Siding
Several paint types are suitable for Hardie Plank siding, each with its characteristics. Acrylic latex paints are a popular choice due to their affordability, ease of application, and good overall performance. However, other options, like elastomeric paints, offer enhanced flexibility and resilience against cracking and stretching. Also, consider high-performance coatings specifically designed for siding, often providing superior protection against the elements.
Importance of Paint Durability and Weather Resistance
Durable and weather-resistant paint is essential for Hardie Plank siding. Exposure to UV rays, rain, and temperature variations can degrade the paint’s appearance and performance over time. A robust paint formulation, including suitable pigments and binders, can significantly extend the siding’s lifespan. Choosing a paint with a proven track record of durability in similar climates is crucial.
Advantages and Disadvantages of Different Paint Finishes
Different paint finishes offer varying aesthetics and performance characteristics. A smooth, low-sheen finish might be preferable for a sleek look, but it may not hide imperfections as well as a higher-sheen finish. Conversely, a high-sheen finish may reflect light more intensely, leading to higher temperatures on the siding. Consider the trade-offs between appearance and performance when selecting a finish.
Paint Brand Comparison
| Brand | Performance on Hardie Plank (Summary) | Key Strengths | Potential Weaknesses |
|---|---|---|---|
| Brand A | Excellent durability, good color retention, and relatively low cost. | Wide range of colors, ease of application. | May require multiple coats for full coverage. |
| Brand B | Exceptional weather resistance, superior UV protection, and longer lifespan. | High-quality formulation, premium performance. | Higher price point. |
| Brand C | Good overall performance, balanced durability, and cost. | Suitable for various climates, decent value for money. | It may not offer the highest level of protection. |
This table provides a general comparison. Detailed performance data and specific recommendations should be sought from paint manufacturers or professionals. Individual results may vary depending on application methods and environmental conditions.
Preparing the Siding for Painting
Proper preparation is crucial for achieving a long-lasting and aesthetically pleasing paint job on your Hardie plank siding. Thorough cleaning, damage repair, and surface preparation techniques ensure optimal paint adhesion and a professional finish. Careful attention to sealing gaps and cracks prevents water damage and future maintenance issues.
Cleaning the Siding
Thorough cleaning of the siding removes dirt, mildew, and other contaminants that can hinder paint adhesion. This step is essential for a successful paint job. A pressure washer is often an effective tool, but use caution to avoid damaging the siding. If using a pressure washer, aim the nozzle at a 45-degree angle and keep a safe distance to prevent damage.
- Remove loose debris: Begin by removing any loose debris, such as leaves, twigs, or other accumulated materials. A stiff-bristled brush or a soft-bristled broom can effectively remove these.
- Wash with detergent: Use a mild detergent solution mixed with water. Apply the solution to the siding using a sponge or soft-bristled brush. Scrub gently to remove dirt and grime. Avoid harsh scrubbing that could damage the siding’s surface. Rinse thoroughly with clean water.
- Inspect for mildew: If mildew is present, use a mildew remover according to the product instructions. Be sure to rinse thoroughly afterward.
- Allow to dry completely: Allow the siding to dry completely before proceeding with any further preparation steps. This ensures the paint adheres properly and avoids issues with moisture.
Addressing Damage and Imperfections
Identifying and addressing any existing damage or imperfections before painting is vital. This step prevents the paint from masking underlying problems that could lead to further issues down the line.
- Inspect for cracks and holes: Carefully inspect the siding for any cracks, holes, or other imperfections. These imperfections need to be addressed before painting to prevent water damage and ensure proper paint adhesion. Small cracks can be filled with a suitable filler, while larger holes require a more substantial repair.
- Repair damage: Use a suitable filler material for the size and type of damage. Ensure the filler is compatible with the siding material and blends seamlessly with the existing siding. Allow the filler to dry completely according to the manufacturer’s instructions.
- Sanding: Sand the repaired areas smooth to ensure a level surface. This step prepares the area for the next stage of painting and ensures a professional finish.
Surface Preparation Techniques
Proper surface preparation is essential for achieving optimal paint adhesion. This involves ensuring a clean, smooth surface that is ready to accept the paint.
- Sanding: Sand the entire surface of the siding with a fine-grit sandpaper. This step helps create a key for the paint to adhere properly. Ensure a smooth, even surface finish for optimal paint adhesion.
- Cleaning: After sanding, thoroughly clean the siding to remove any dust or debris. This step is critical for paint adhesion. Use a damp cloth or a vacuum cleaner with a brush attachment.
- Primer Application (Optional): Apply a suitable primer to areas with significant repairs or if needed. A primer provides a barrier for the paint and helps it adhere better to the surface. Choose a primer that is compatible with the siding and paint materials.
Caulking and Sealing Gaps and Cracks
Caulking and sealing gaps and cracks is crucial to prevent water damage and improve the siding’s overall appearance. Addressing these imperfections before painting is essential to prevent water penetration and maintain the integrity of the siding.
- Identify Gaps and Cracks: Carefully examine the siding for gaps and cracks. These areas are vulnerable to water damage and need to be sealed to maintain the integrity of the siding. Look for spaces between planks, around windows and doors, and any other gaps or cracks.
- Caulk and Seal: Use a high-quality exterior caulk designed for siding. Apply the caulk to the gaps and cracks, ensuring a smooth, even application. Allow the caulk to dry completely according to the manufacturer’s instructions.
- Finishing: If needed, sand the caulked areas smooth to ensure a seamless finish and prevent a noticeable caulk line. This step ensures the integrity and professional finish of the siding.
Painting Techniques and Tools
Proper painting techniques are crucial for achieving a long-lasting and aesthetically pleasing finish on Hardie Plank siding. Careful application and the selection of suitable tools directly impact the paint’s durability and the overall appearance of your home. Understanding these techniques ensures an even coat and minimizes potential issues like drips, runs, and uneven texture.
Painting Methods, Painting Hardie Plank Siding
Different painting methods offer varying levels of efficiency and control. Choosing the right method depends on factors such as the size of the area, the desired level of detail, and the type of paint being used. A balanced approach, combining different methods, is often ideal.
- Roller Application: For large, flat surfaces, a roller provides efficient coverage. Use a high-quality nap roller designed for exterior paints. Maintaining even pressure and avoiding excessive overlapping is vital for a consistent finish. Apply in overlapping, smooth strokes, ensuring a complete coat without skips. The roller method is ideal for large areas and can speed up the process significantly.
- Brush Application: For intricate details, trim work, and hard-to-reach areas, a brush is indispensable. Select a high-quality brush with synthetic bristles, designed for exterior paints. Applying even strokes and avoiding unnecessary pressure is key to achieving a clean, professional look. The brush technique is excellent for corners, edges, and fine details.
- Spray Application: A spray gun allows for rapid coverage of large areas. Using a spray gun requires proper technique to avoid overspray and uneven application. Proper dilution of the paint and maintaining a consistent distance from the siding are crucial for achieving an even finish. This technique is best for large projects.
Application Guidelines
Proper application techniques are essential for achieving a high-quality finish. These guidelines will ensure a uniform coat and reduce the risk of imperfections.
- Prep the Surface: Ensure the siding is thoroughly cleaned and free of any debris, dust, or dirt. This creates a clean surface for the paint to adhere to properly.
- Apply in Thin Coats: Applying multiple thin coats is better than one thick coat. Thin coats allow for better drying time and reduce the risk of runs or drips. Wait for each coat to dry completely before applying the next.
- Work in Sections: Painting in smaller sections allows for better control and reduces the likelihood of errors. This approach also facilitates quicker drying times and provides a more manageable workload.
Painting Tools
Selecting the appropriate painting tools is crucial for achieving a professional finish. Consider the surface area, the paint type, and the desired level of detail.
| Tool | Description | Benefits |
|---|---|---|
| High-Quality Roller | Designed for smooth application and even coverage. | Excellent for large surfaces, ensures even coverage, and reduces drips. |
| Synthetic Bristle Brush | Ideal for intricate details and hard-to-reach areas. | Provides precision and control for edges, corners, and small areas. |
| Exterior Paint Sprayer | Allows for rapid coverage of large areas. | Efficient for large projects, provides consistent coverage. |
| Paint Trays | Essential for holding and transporting paint. | Keeps paint organized and prevents spills. |
Achieving a Smooth Finish
Achieving a smooth, even finish requires a combination of proper application techniques and the right tools.
- Maintain Consistent Pressure: Consistent pressure while painting ensures even coverage and minimizes runs or drips. Adjust pressure depending on the tool and the surface being painted.
- Overlap Strokes: Overlapping strokes ensure complete coverage without skips or gaps. The overlap should be minimal to avoid runs and ensure a seamless finish.
- Proper Drying Times: Allowing sufficient drying time between coats minimizes the risk of imperfections. Following the paint manufacturer’s recommendations for drying times is crucial.
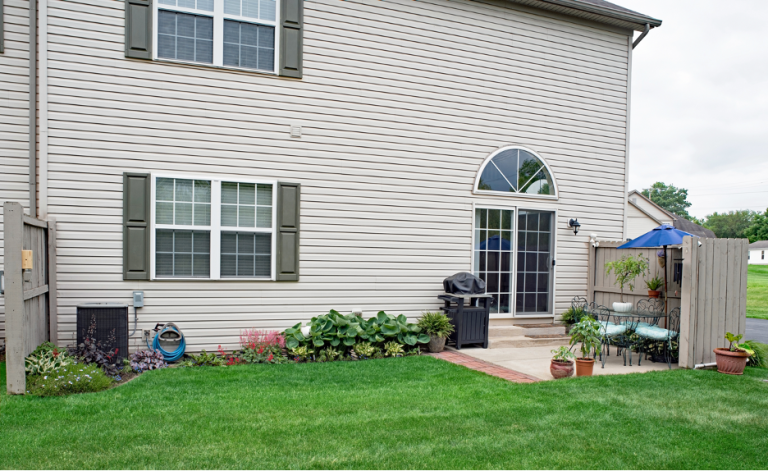
Color Selection and Design Ideas
Choosing the right color palette for your Hardie Plank siding is crucial for enhancing your home’s curb appeal and reflecting your style. A well-chosen color can significantly impact the overall aesthetic, creating a cohesive and visually appealing exterior. This section explores color trends, architectural considerations, and design ideas to help you make informed decisions.
Understanding color trends and architectural styles can guide your color selection. Contemporary designs often favor muted tones and neutral palettes, while traditional homes might benefit from bolder colors or classic combinations. Consider the existing architectural features of your home when selecting colors, ensuring a harmonious blend with the overall design.
Color Trends and Popular Choices
Recent color trends for Hardie Plank siding lean towards a range of shades, from warm neutrals to cool, contemporary tones. Popular choices include grays, beiges, and browns, offering versatility for various architectural styles. These colors are often paired with white trim for a clean, classic look. However, bolder colors such as blues, greens, and terracotta are also making a resurgence, particularly for homes seeking a more distinctive appearance.
Complementing Home Architecture
Selecting colors that complement your home’s architecture is paramount. For instance, a craftsman-style home might look stunning with a rich brown or a warm gray, while a modern farmhouse could embrace a cool gray or a soft beige. Consider the roof color, window frames, and existing landscaping when making your decision. Careful consideration of these factors ensures the chosen color harmonizes with the overall aesthetic.
Color Palettes for Different Architectural Styles
Different architectural styles often benefit from specific color palettes. A Tudor-style home, with its steeply pitched roofs and intricate details, might be well-suited to a deep terracotta or a rich burgundy. A Colonial-style home might look best with a classic white or a light gray. Modern designs, on the other hand, frequently favor a neutral color palette that can emphasize clean lines and contemporary features.
Color Combinations for Hardie Plank Siding
| Architectural Style | Primary Color | Accent Color (Trim) | Secondary Color (optional) |
|---|---|---|---|
| Modern Farmhouse | Soft Beige | White | Light Gray |
| Craftsman | Warm Gray | White | Dark Brown |
| Tudor | Deep Terracotta | Cream | Dark Green |
| Colonial | Classic White | Dark Gray | N/A |
| Contemporary | Cool Gray | Black | N/A |
This table offers examples of color combinations. Feel free to adapt these suggestions based on your specific home’s architectural features and personal preferences.
Incorporating Accent Colors and Patterns
Accent colors and patterns can add visual interest and depth to your Hardie Plank siding. Consider using a contrasting accent color for trim or window frames to highlight architectural details. For instance, black trim with a light gray siding can create a striking contrast. Adding a subtle pattern, like a slightly darker shade of the primary color in a repeating vertical or horizontal stripe, can also create an intriguing visual effect. The key is to ensure the chosen accent color and pattern complement the overall design and don’t overwhelm the home’s architecture.
Project Management and Safety
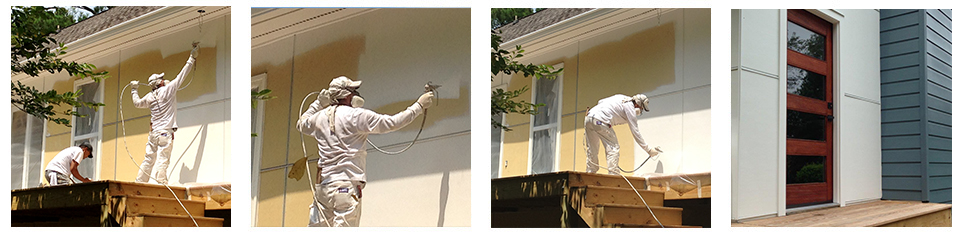
Source: firstratesiding.com
Planning and executing a Hardie plank siding painting project effectively requires careful consideration of various factors. This involves meticulous planning, efficient organization, and awareness of potential hazards. Proper safety protocols are paramount to ensure a smooth and successful project. Effective project management can significantly reduce potential issues and minimize disruptions.
A well-structured approach to painting involves a series of steps, from initial planning to final cleanup. By anticipating potential problems and taking proactive measures, you can significantly reduce the risk of delays, errors, and accidents. This proactive approach not only ensures a high-quality finish but also safeguards your well-being and protects your property.
Planning and Organizing the Project
A well-defined plan is essential for a successful painting project. This includes creating a detailed timeline, identifying necessary resources (materials, tools, labor), and setting realistic expectations. Thorough preparation lays the groundwork for smooth execution.
- Establish a clear timeline, breaking down the project into manageable phases. This helps you track progress and anticipate potential delays.
- Develop a detailed materials list, including paint type, primer, and necessary tools. Accurate material quantities prevent shortages and ensure a consistent finish.
- Determine the project’s budget and allocate resources accordingly. Consider the cost of materials, labor (if applicable), and potential unforeseen expenses.
- Create a site plan, noting access points, storage areas, and any obstacles. This helps with efficient workflow and reduces disruptions.
Managing the Painting Process
Effective management during the painting process involves close monitoring, proactive problem-solving, and communication. Regular progress checks help ensure adherence to the timeline and address any potential issues promptly.
- Regularly assess progress against the planned schedule. Address any deviations promptly to prevent delays.
- Establish clear communication channels with any subcontractors or helpers. This facilitates collaboration and ensures everyone is on the same page.
- Implement a system for tracking and managing materials. This ensures materials are used efficiently and avoids unnecessary waste.
- Conduct quality checks throughout the process to maintain consistency and ensure the desired finish is achieved. Document any discrepancies for prompt resolution.
Potential Safety Hazards
Painting projects present potential safety hazards that must be addressed proactively. These hazards include exposure to harmful chemicals, potential falls, and equipment malfunctions.
- Chemical Exposure: Proper ventilation, personal protective equipment (PPE) like respirators, and appropriate handling procedures are crucial to mitigate the risks associated with paint fumes and other chemicals.
- Fall Hazards: Use scaffolding, ladders, or other appropriate safety equipment when working at heights. Inspect equipment before each use to ensure its structural integrity.
- Equipment Malfunctions: Regular maintenance and inspection of tools and equipment are essential. Immediately address any malfunctions to prevent accidents.
- Electrical Hazards: Ensure all electrical tools and equipment are grounded and in proper working order. Never work with electrical tools in wet conditions.
Avoiding Common Painting Project Problems
Proactive measures can minimize common painting project problems. This involves meticulous preparation, adherence to instructions, and prompt resolution of issues.
- Poor Surface Preparation: Thoroughly clean and prepare the surface to ensure the paint adheres properly. Addressing issues like loose or damaged siding before painting minimizes the risk of peeling or bubbling paint.
- Incorrect Paint Selection: Choosing the appropriate paint type and color is crucial. Consult with paint professionals if needed to determine the ideal paint for the specific Hardie plank siding.
- Weather Conditions: Painting should only be performed in appropriate weather conditions. Extreme temperatures, rain, or high humidity can affect the paint’s drying time and quality. Consult with experts about optimal weather conditions for specific paint types.
- Lack of Proper Ventilation: Adequate ventilation is essential to prevent harmful fumes from accumulating. Open windows, use fans, or other ventilation methods to maintain appropriate air quality.
Project Management Checklist
A checklist provides a systematic approach to managing the entire painting project. This helps ensure that all necessary steps are completed effectively and efficiently.
| Task | Status | Date Completed |
|---|---|---|
| Planning & Budgeting | Pending | |
| Material Procurement | Pending | |
| Site Preparation | Pending | |
| Paint Application | Pending | |
| Quality Checks | Pending | |
| Cleanup | Pending |
Maintenance and Troubleshooting: Painting Hardie Plank Siding

Proper maintenance of your painted Hardie Plank siding is crucial for preserving its aesthetic appeal and longevity. Regular inspections and timely addressing of minor issues can prevent larger problems from developing and significantly extend the life of your siding. This section will detail the importance of regular maintenance, common problems, and solutions to help you maintain your painted Hardie Plank siding.
Importance of Regular Maintenance
Regular inspection and cleaning of your Hardie Plank siding are vital. This proactive approach helps detect and address issues early, preventing costly repairs later. Routine maintenance involves simple checks for damage, discoloration, or signs of moisture intrusion. Identifying and rectifying problems quickly can prevent more significant damage and maintain the high quality and visual appeal of your siding.
Common Problems After Painting
Several issues can arise after painting Hardie Plank siding. Paint discoloration, peeling, or blistering are common occurrences. These problems can be attributed to various factors, including improper surface preparation, poor paint quality, or environmental conditions. Identifying the root cause of the problem is key to selecting the appropriate solution.
Addressing Minor Issues
Minor issues like paint discoloration or peeling can often be addressed with simple solutions. For paint discoloration, try cleaning the affected area with a mild detergent solution and water. If the discoloration persists, a touch-up paint job might be necessary. For peeling paint, carefully remove the loose paint with a scraper. Then, thoroughly clean the area, prime it, and reapply paint using a suitable brush or roller.
Preparing for Future Repainting or Touch-ups
Preparing for future repainting or touch-ups involves meticulous planning. Regular inspection allows you to identify areas that might need attention before they become significant problems. Documenting any existing damage, like peeling or discoloration, is crucial for planning future maintenance. Keeping records of past repairs or treatments will also help in future maintenance efforts.
Long-Term Durability of Painted Hardie Plank Siding
Hardie Plank siding, when properly painted and maintained, demonstrates remarkable durability. It’s resistant to many environmental factors, including moisture, insects, and weathering. However, factors like improper paint application, exposure to extreme weather, and inadequate maintenance can impact the longevity of the siding. By following the recommended maintenance procedures, you can extend the life of your Hardie Plank siding, preserving its aesthetic appeal for many years.
Cost Considerations
Painting Hardie Plank siding can be a significant investment, and understanding the factors affecting the cost is crucial for planning. Careful consideration of labor, materials, and potential extras will help ensure a budget-friendly project.
Factors Influencing Painting Costs
Several factors contribute to the overall cost of painting Hardie Plank siding. These include the size of the surface area, the complexity of the design, the condition of the existing siding, the quality of the paint used, the geographic location, and the labor rates in the area. Accessibility and the presence of architectural details or challenging areas will also influence the project’s cost.
Typical Labor and Material Costs
Estimating costs requires a nuanced approach. A basic estimate for painting a 1,000 square foot house with a simple design using mid-range paint might range from $2,000 to $4,000 for labor and $500 to $1,000 for materials. However, these are very rough estimates. Actual costs will depend on the specific circumstances. Factors like the number of coats needed, the condition of the siding (e.g., extensive patching required), and the need for specialized tools will affect the final cost.
Tips for Saving Money
Several strategies can help reduce costs without sacrificing quality. Choosing a paint with a good coverage rate can minimize the number of coats required, thereby lowering material costs. Painting during the off-season can often result in lower labor rates. If the siding is in good condition, pre-painting preparation will be less extensive, saving labor time and costs. Also, consider using a more budget-friendly paint while maintaining good quality.
Pricing Models for Painting Services
Different painting companies may use various pricing models. Some may charge by the square foot, while others may offer a flat rate for the entire project. Some may include preparation in the cost, whereas others may charge extra for preparation work, such as cleaning, caulking, and repairs. A written estimate with a detailed breakdown of costs is essential for clarity and avoiding surprises.
DIY vs. Professional Painting Costs
A DIY approach can potentially save money, but the time commitment, required skill level, and potential for mistakes must be considered. A professional painter possesses expertise and specialized equipment, often leading to a faster and more precise job. The quality of the finish and the potential for damage from improper techniques need to be considered in the decision-making process. For example, a simple project might be more cost-effective for a DIYer, while a large or complex project might be better handled by a professional. Researching local labor rates for painting services can give a better understanding of the potential costs involved with professional help.
Examples of Pricing Models
| Pricing Model | Description | Example |
|---|---|---|
| Per Square Foot | Cost is calculated based on the area to be painted. | $5 per square foot for a 1,000 sq ft house = $5,000 |
| Flat Rate | A fixed price for the entire project. | $3,500 for a 1,000 sq ft house |
| Hourly Rate | Cost is calculated based on the time spent on the project. | $50/hour for 40 hours = $2,000 |
Last Point
In conclusion, painting Hardie plank siding involves a multi-step process demanding attention to detail. By following this comprehensive guide, you can navigate the complexities of this project and achieve a stunning, long-lasting result. Remember that careful preparation, selection of appropriate materials, and adherence to proper techniques are essential for a successful outcome. From initial cleaning to final touch-ups, this guide equips you with the knowledge to transform your home’s exterior.